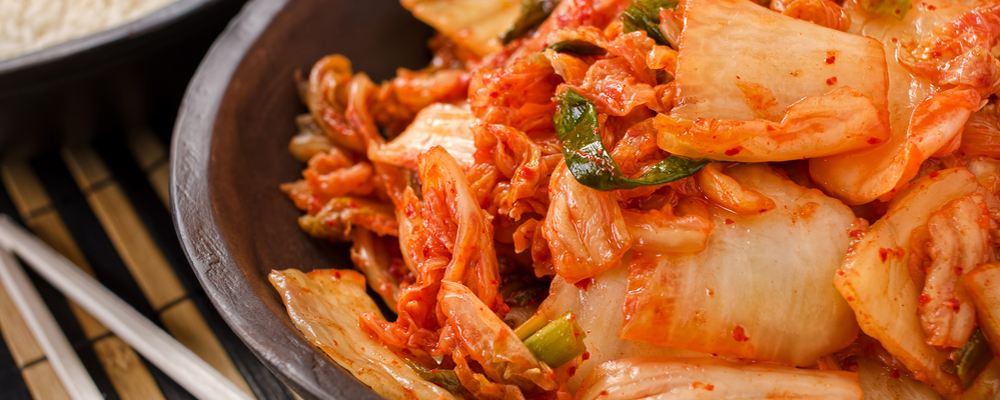
Kimchi is a nutritious food that is excellent for your digestive system. Originating in Korea – and a staple of Korean cuisine – kimchi is often eaten as a side dish with a larger meal. There are many different versions of this fermented food dish, with many different vegetables being used as the main ingredient. But it’s the cabbage version of kimchi that is the most famous, especially in the USA and Europe.
Before we get onto the recipe for homemade kimchi, let’s have a look at some of the amazing health benefits that eating kimchi can provide you with:
The Benefits of Eating Kimchi

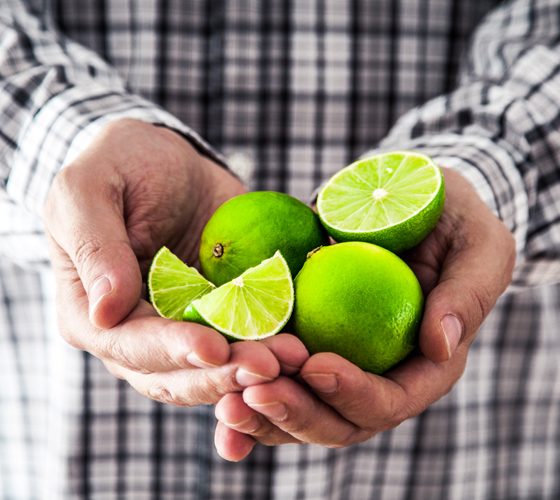
Kimchi is proven to lower cholesterol levels. That’s because it contains garlic, which has got allicin and selenium inside it. These are both excellent substances for your body, and they act as a cleanser inside your arteries, removing plaque. This will even lower your chances of having a stroke or a heart attack.
Kimchi is a probiotic, and this is why it’s eaten by so many people. Probiotics have a hugely beneficial effect on your gut health. People who regularly eat kimchi will have less chance of diarrhea and other digestive related issues.
Kimchi contains ‘healthy bacteria.’ The benefit of this healthy bacteria is a more effective digestive system, as well as an improvement to your immune system.
Some studies have shown that kimchi can even slow down aging. It helps to reduce chronic inflammation.
Other benefits that kimchi is known to cause are an improvement to heart health, an aid to losing weight, and it may prevent yeast infections.
How to Make Kimchi at Home
There is a common misconception that fermented foods are difficult for the average person to make at home. That’s why people often go to health stores and pay over the odds for a jar of kimchi or kombucha. Making kimchi isn’t a major procedure. It might take a little practice to get it perfect every single time, but there is a clear procedure that you can follow to ensure that you’re in the best position to make some tasty, healthy kimchi.
Before you can make your kimchi, you need to make sure that you have the right ingredients and equipment. You’ll need:
- Peeled, fresh ginger – 1 teaspoon
- Distilled or filtered water
- Granulated sugar – 1 teaspoon
- Fish sauce (alternatively, shrimp paste) – 2 tablespoons
- Gochugaru (AKA Korean red pepper flakes) – 3 tablespoons
- Daikon radish – 8 ounces (cut the radish into matchsticks)
- Medium scallions – 4 (Trim, then cut into pieces that are approximately 1 inch)
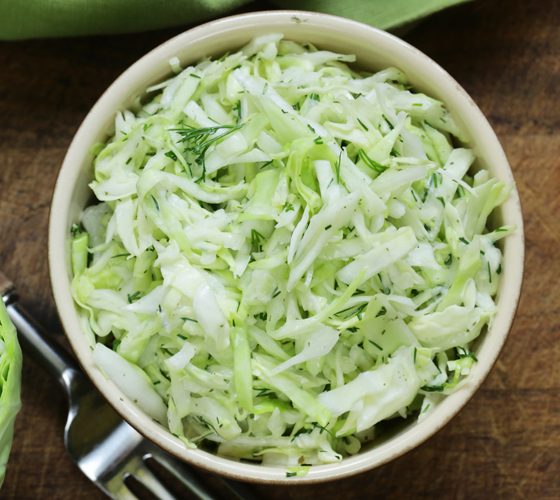
- Head Napa cabbage –Approx. 2lbs
- Kosher salt or iodine-free salt – ¼ cup
- A cutting board
- Something heavy, such as a jar or plate
- A clean, sterilized jar (1-quart) with a secure lid (plastic or canning)
- A bowl
- A colander
Method
Step One:
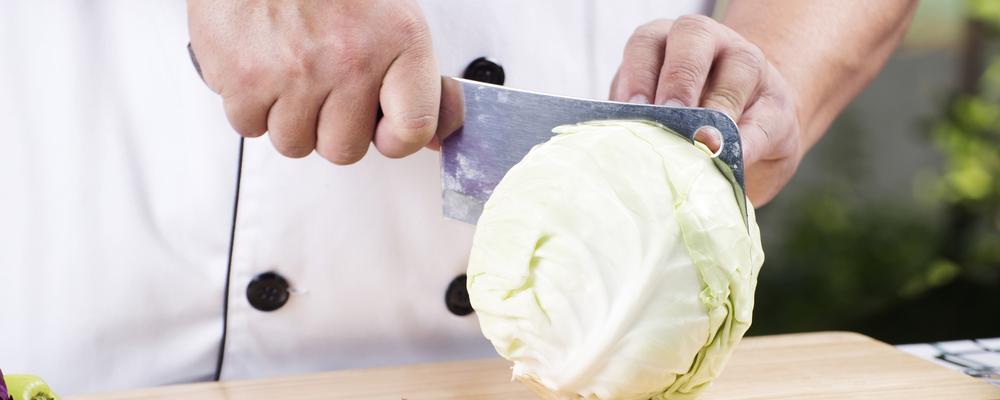
– Quarter the cabbage, then remove the stems from each piece, and then slice the cabbage into pieces that are approximately 2-inches wide.
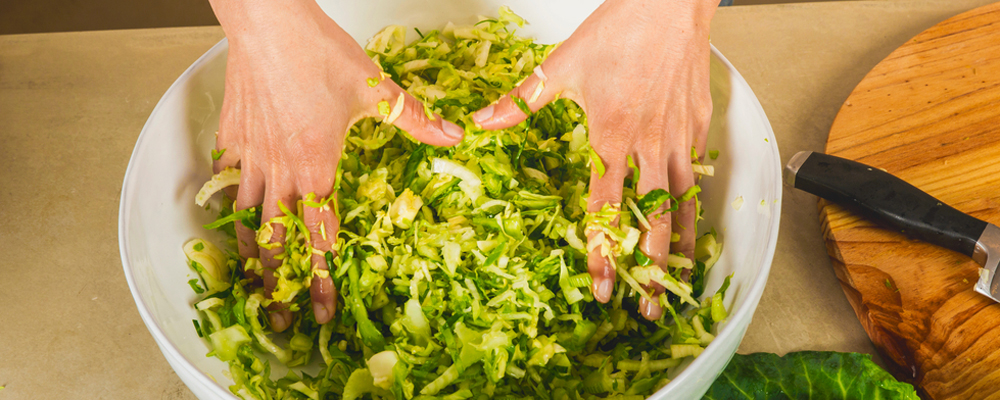
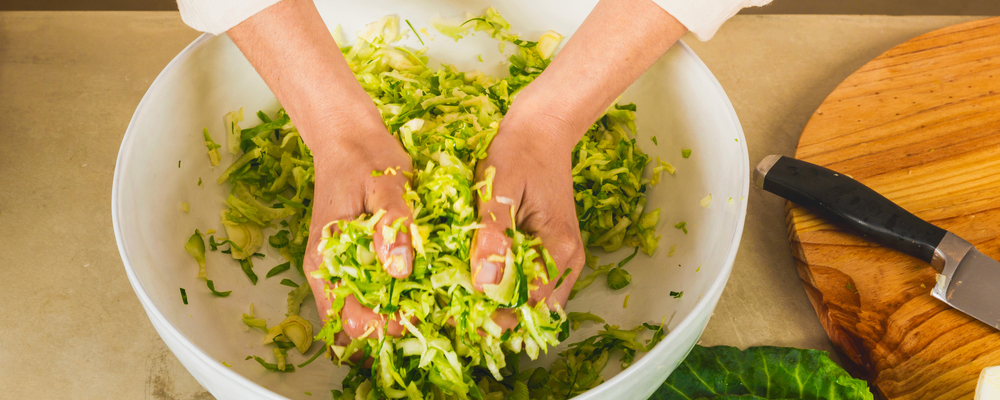
Step Two:

– Put the cabbage into the bowl. Sprinkle salt onto the cabbage. Keep massaging the salt into the cabbage. When it begins to feel soft, then stop.
Step Three:
– Submerge the cabbage in water. Put in just enough water to cover the cabbage. Use the heavy object to keep the cabbage underneath the water, then leave the cabbage and the bowl for about 2 hours.
Step Four:
– Remove the cabbage from the bowl and rinse it. You need to do a thorough job of rinsing it, so it’s recommended that you clean each piece of cabbage three times. Then you should put the cabbage into a colander and leave it to drain. This should take about 15 minutes.
Step Five:
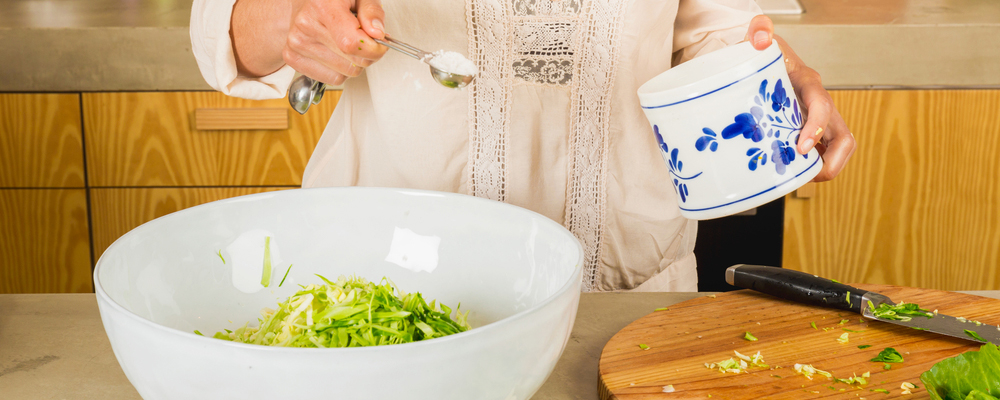
– Put the ginger, fish sauce, garlic, and sugar into a bowl, then stir it all together. Add the gochugaru, then put the bowl onto the side.
Step Six:
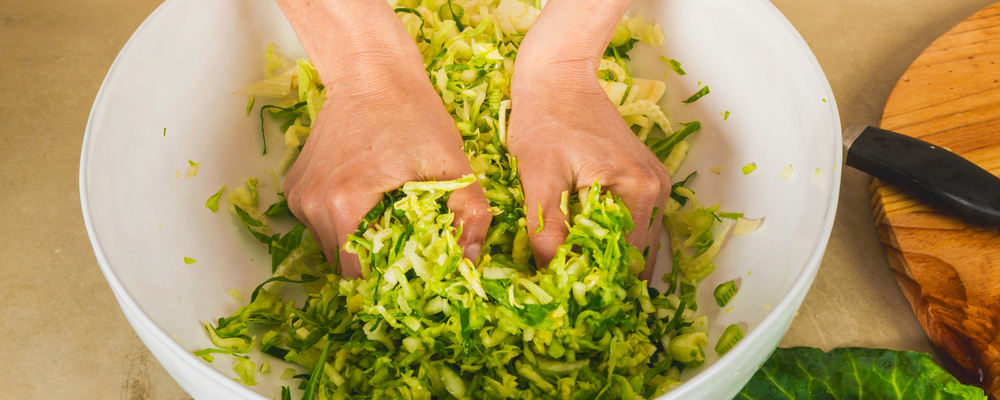
– Return to the cabbage. Squeeze the cabbage to ensure that you have drained all the water out of it. Then put the cabbage into the bowl with the other ingredients. Add the scallions and the radish to the mixture. Then mix everything. You should ensure that you do this thoroughly. All the vegetables need to be covered entirely with the sauce.
Step Seven:
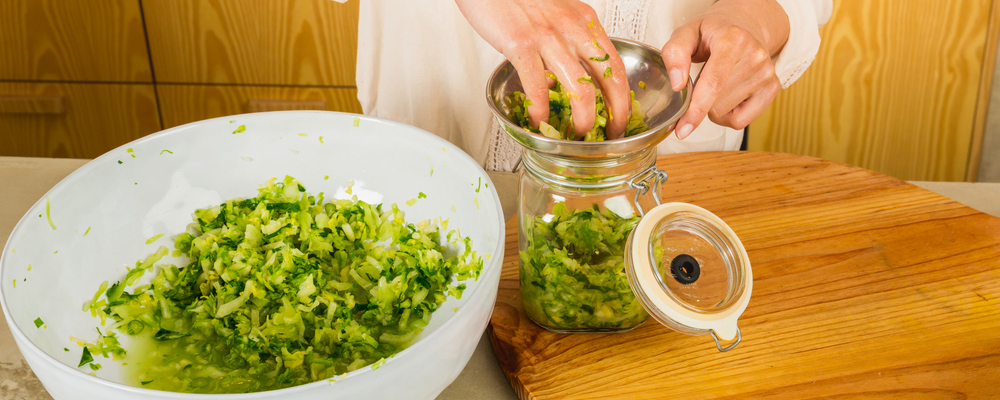
– Put it into the jar. Then press down on the vegetables so that brine is released. This brine should cover all the contents of the jar. You need to leave about 1 inch at the top of the jar empty. Then put the lid on. Ensure that it’s completely sealed.
Step Eight:
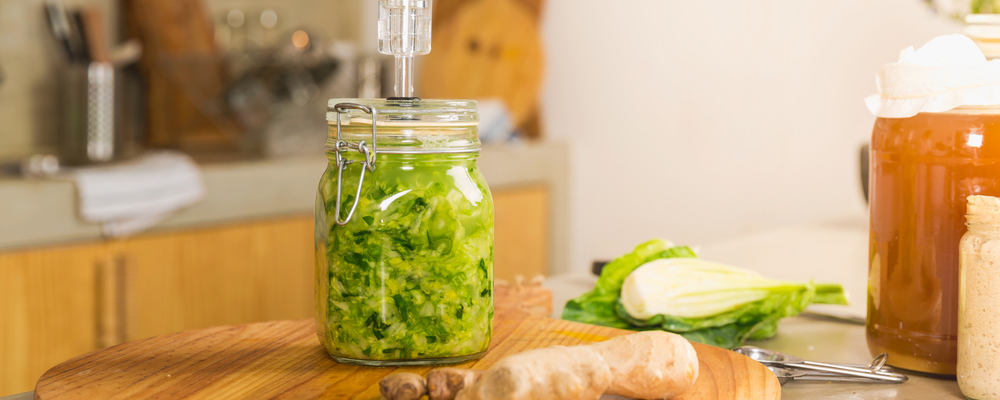
– Now it is time for the kimchi to ferment. This process requires the jar to be placed somewhere that is at room temperature and is entirely out of sight of sunlight. It will take between one and five days. You’ll notice some bubbling, and the brine could start to come out of the lid.
Step Nine:
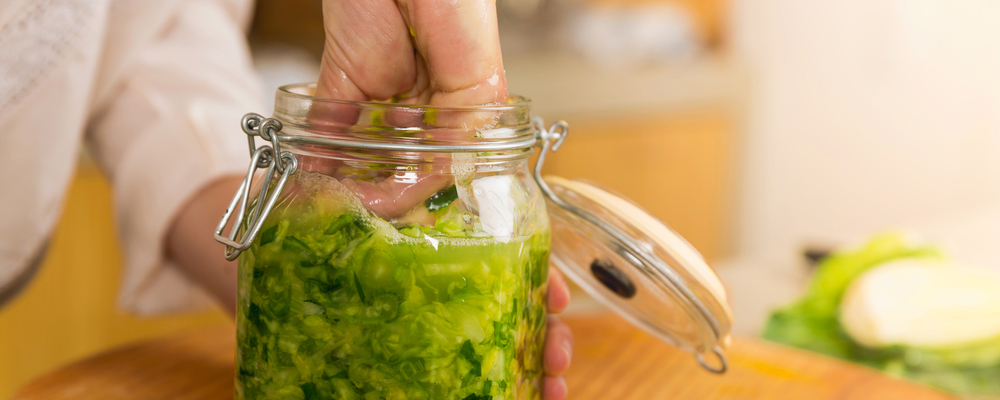
– During the fermentation period, you must check the kimchi daily. To do this, you should open the lid and press down on the veg with your finger. This is required so that the brine is released. The brine has to always cover all the vegetables inside the jar. It’s recommended that you taste the kimchi from time to time.
When it is how you like it, then the kimchi is good to eat, and then you can transfer it to the fridge. While it’s possible to begin eating the kimchi at this stage, most experts recommend that it’s left in the fridge for two weeks before you eat it, so that you get the best flavor and health benefits from it.
Conclusion
Kimchi is a fantastic food that provides you with countless health benefits. It is, perhaps, the healthy bacteria and the probiotics contained in kimchi that is responsible for its biggest benefits. Eating kimchi can lead to a healthier digestive system, an improved immune system, and can even help to slow down aging. It isn’t difficult to make kimchi at home.
Once you’ve done it a couple of times, then it will become second nature, only taking you a short time to prepare it for the fermentation period. Making kimchi at home will save you a lot of money in the long run, and is highly recommended if you want to incorporate it into your diet. Eat kimchi often to gain its health benefits.